
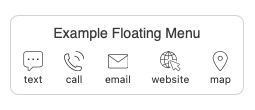
The Menu Action allows you to add a menu bar to your app to give users convenient access to other Actions through labeled icons.
Optionally, the Menu can be anchored to the bottom of the screen or it can "float" and be in any position in the app. It can even extend across the entire width of a desktop display.
You can have as multiple menus in an app.
Creating a Menu
Add the Actions that you want to be in the menu.
As you add each Action, a corresponding icon will appear above the Action selector. Edit this by choosing an appropriate icon and optionally add a Label.
Rearrange the Actions with their drag handles to rearrange the icons in the menu.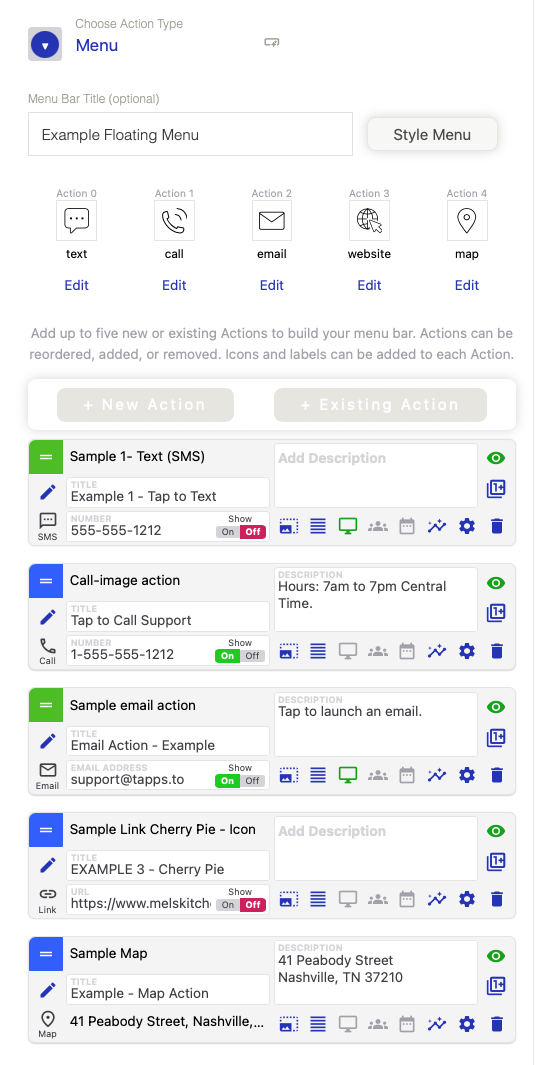
Next, you can select the style of your Menu.
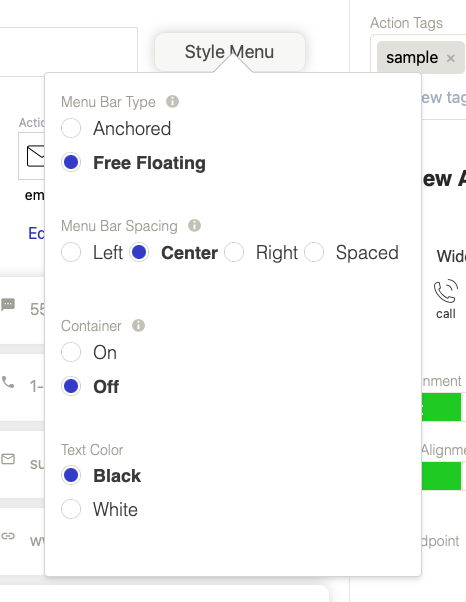
The primary choices are if the Menu is anchored to the bottom and the menu spacing.
If you select it to be "Free Floating" then you will also be able to choose if it has a container (i.e. a surrounding bubble). If you choose no container, you will be able to select the text color to work with your background color. If you select a container, then the action will automatically match the style of all other actions on the page.
You can also optionally choose a title for menu that will appear above the icons.
__
Reference the Action Formatting and Controls FAQ for a refresher on the controls that are common to Actions.
Comments
0 comments
Please sign in to leave a comment.